Big, Round, Groovy Buttons!

I’m a big fan of Pete the Cat – created by Eric Litwin – particularly his story about Pete the Cat’s favourite shirt. It’s an excellent reminder for young children that they don’t need to be attached to material things at a time when they are just discovering the second law of thermodynamics for the first time themselves. It deals with the topic in a far more positive way than yelling at them that they need to grow up and stop crying over trash.

What’s this got to do with computer science on the classroom door? I hear you ask.

Two words: user interfaces!

How big should a button be? How big can a button be?

Why shouldn’t you make a button as big as a desk? If that’s what is needed – then go ahead! Obviously, often it isn’t. It would be a little impractical for typing a letter on a keyboard that takes up most of a classroom’s available floor space – but great for staging a massive dance performance. That’s why context is so important.

So, I take some sheets of A3 coloured card and make a couple of big, round groovy buttons. The coloured buttons can be printed out or written upon. They stick onto three sheets of card. The top and bottom sheets need some conductive material added to them. You can use aluminium kitchen foil, copper conductive tape or even just draw your circuit with a 2B (0) pencil.

The conductive sides of your card should face eachother, with the third sheet of card in the middle – with holes cut into it, so that when the conductive faces are pressed together, they meet.

Last time I did this, I made two buttons. One green and one red. There’s a reason for that. Can you guess why?

The buttons were then fixed to my classroom door.

I used a Makey Makey to connect my buttons to a computer, and because my interactive whiteboard was close enough to the door, we used that to output the results this time. However, there’s nothing to stop you from connecting a Raspberry Pi and a small screen or just having audio output.

So…

What do you want your buttons to do?

I used Scratch to make my screen change colour to match the button pressed.

In one version of this, I then had one button play the refrain from Pete the Cat and his Four Groovy Buttons. If you’re not familiar with it, go along to Harper Collin’s Pete the Cat subsite and enjoy it…

You could also use Scratch to record your class singing the Pete the Cat song and replay it when you press the button.

But why two buttons?

Because you know someone is then going to ask that all important question…

If pressing the red button makes the screen go red; and pressing the green button makes it go green…

What happens when you press them both together?

The code for doing this is a little more complicated – which is what I wanted to discuss with my classes – as I used variables to keep track of which buttons were pressed.

But it also gave us the opportunity to talk about what happens when you mix red light and green light together…

Hint: I have now found it useful to keep a small supply of RGB LEDs and some coin cells handy so that the children can see the results of mixing lights for themselves in small groups.
 

Moonshot Thinking

There’s an interesting quote on the Google Moonshot Summit website. It says:

“A moonshot is an ambitious, exploratory and ground-breaking project undertaken without any expectation of near-term success or benefit and also, perhaps, without a full investigation of potential risks and benefits.”

One of the things I like about the International Baccalaureate is the insistence that a well-constructed curriculum should promote the IB Learner Profile.

One of the attributes listed is Risk-Taking

When my students are preparing to share a presentation with the whole class, I often remind them about how outstanding an achievement this is. “Given the choice,” I say, “between standing up in front of a group of people and giving a talk, or swimming through shark-infested waters; the vast majority of adults will reply, ‘Give me a set of trunks’!”

This is one aspect of risk-taking we can model for our students. But it shouldn’t be the only one.

One of the unintended consequences of a desire to improve standards in some schools has been a disincentive for teachers to take risks. If a tried-and-tested formula is guaranteed to produce mediocre, but acceptable results, why should a young teacher put their future career on the line by daring to try a different approach?

My contention is that the lessons learned by students participating in projects that see risk-taking in action by teachers willing to make mistakes have the potential to be more valuable than the actual subject content.

This is one of the reasons why I enjoy teaching computer science; a creative academic discipline which constantly reinvents itself as new tools become available to us. It forces us to take risks and look for new solutions to an ever-widening range of problems we feel confident to tackle.

Right now, I’m also humbled by the prospect of meeting with up to 40 other like-minded risk-takers, problem-solvers and educators at Google’s Moonshot Summit in just a few short weeks. Some of them, I already know. We’ve met and shared examples of good practice before. It’s going to be an exciting time.


Intelligent Nightlights

We completed a control technology project with my 8th Grade class this term. The students could choose from a range of tools and materials including

  • Raspberry Pi
  • Arduino
  • Makey Makey
  • Lego
  • 3D printed enclosures, or using a 3D extrusion pen

So, we discussed what types of project they could make, and I mentioned an alarm system. Immediately they asked how this would be different from a simple burglar alarm project they had completed a few years earlier when learning about electricity.

You’ve probably seen the experiment before, you make a simple pressure pad using card and some conductive material (could be wire, kitchen foil, conductive tape or even graphite pencil!).  When the surfaces are brought together, it completes a circuit with a battery and a buzzer.

I responded by listing the following modifications:

  • Create a delay between the mat being stepped on, and the alarm sounding
  • Change the buzzer sound to a recorded sample played via your computer or another device
  • Change the volume of the sound to increase over time.
  • Add flashing lights
  • Set a maximum time for the alarm to sound for
  • Reset the alarm to replay after a suitable delay
  • Use additional sensors to make the alarm effective in different contexts – eg a Hall effect sensor and a magnet fastened to a door

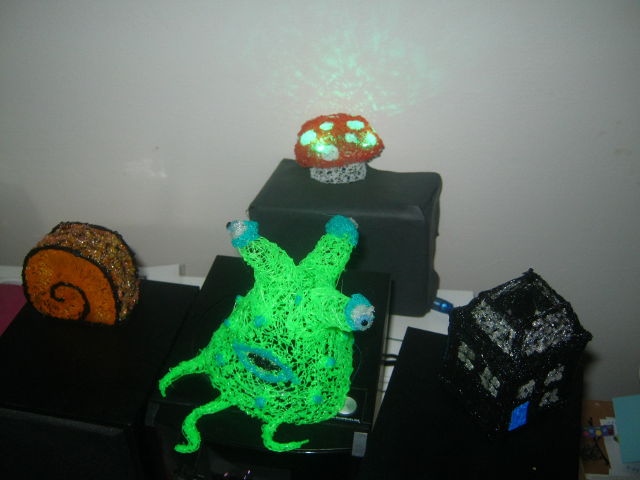
To show my classes what was possible, I used a 3D extrusion pen to make some models.

nightlights
Four intelligent nightlights

Starting with the house, I added an infra-red sensor so I could switch an LED embedded inside it on or off. We then changed this to a simple button which would light the house up when pressed, and switch off when not. We changed this to a delay, so that the house lights would switch on for a set number of seconds before turning off. Some of the students made their own houses and used capacitative touch sensors to trigger the lights coming on.

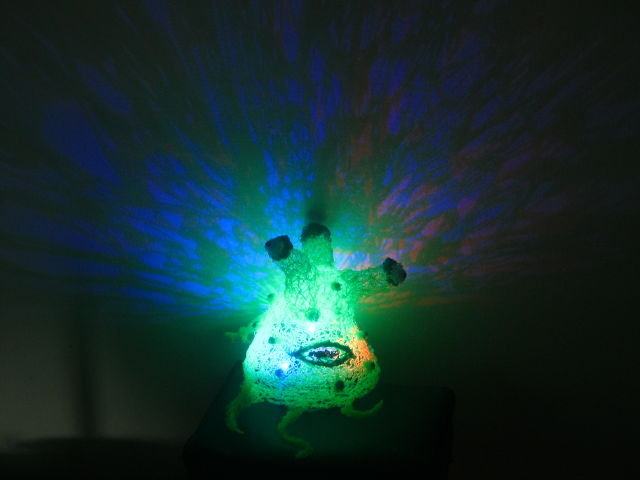
Finally, we looked at using a light sensor – so that when it gets dark, the lights go on, by using three RGB LEDs switching on and off randomly.

This meant you could make nightlights which cast interesting patterns on the wall as the colours of the LEDs change. My contributions included these three:

snail
Snail light
alien
Guard Monster
fly acgaric in plastic with LEDs
Glowing toadstool

The creative process doesn’t stop there though. We discussed using a microphone to make a noise activated light; using PWM pins on an Arduino to dim/brighten the lights or phase from one colour to the next; adding a proximity sensor so that as someone approaches the light, it switches on or changes colour, and a buzzer that sounds if they get too close.

On my classroom door…

This will be my theme for this summer’s posts.

I stick interactive electronic displays on my classroom door.

It’s a great way to introduce different problem-solving and programming skills to students.

So, I plan to showcase some of last year’s projects and introduce some of my ideas for the coming school year.

I’m thinking I could turn this material into an ebook for teachers to download and get inspired by…

Let’s see what happens.

Code Week is Coming…

EU Code Week is coming again – get ready for exciting programming and problem solving activities taking place across Europe between 10-18 October 2015.

Ada Lovelace Day will take place during the week, so I’ll be preparing some of my students for a girls-only extravaganza. More information will be revealed closer to the date. Ideally I’d be looking to collaborate with some other clubs around the region.

If that isn’t exciting enough, Africa will host its own code week from 1-10 October.

Not another tech blog by a teacher?

I thought carefully about this.  I have something to share which I haven’t seen anywhere else. That being said, it wouldn’t surprise me if there are hundreds of other teachers around the world, working on similar projects.

I could add this to one of the sites I already maintain – but the content – my Raspberry Pi projects – suits the domain well.

My first aim is to tell the story behind some of my Raspberry Pi projects – the odd Arduino, Makey Makey and other boards will make an appearance too from time to time.